The Exposure Triangle for Photo Booth Owners: Aperture, Shutter Speed and ISO Made Simple
 Download the free cheat sheet
Free to print and share. 1920 x 1920 PNG.
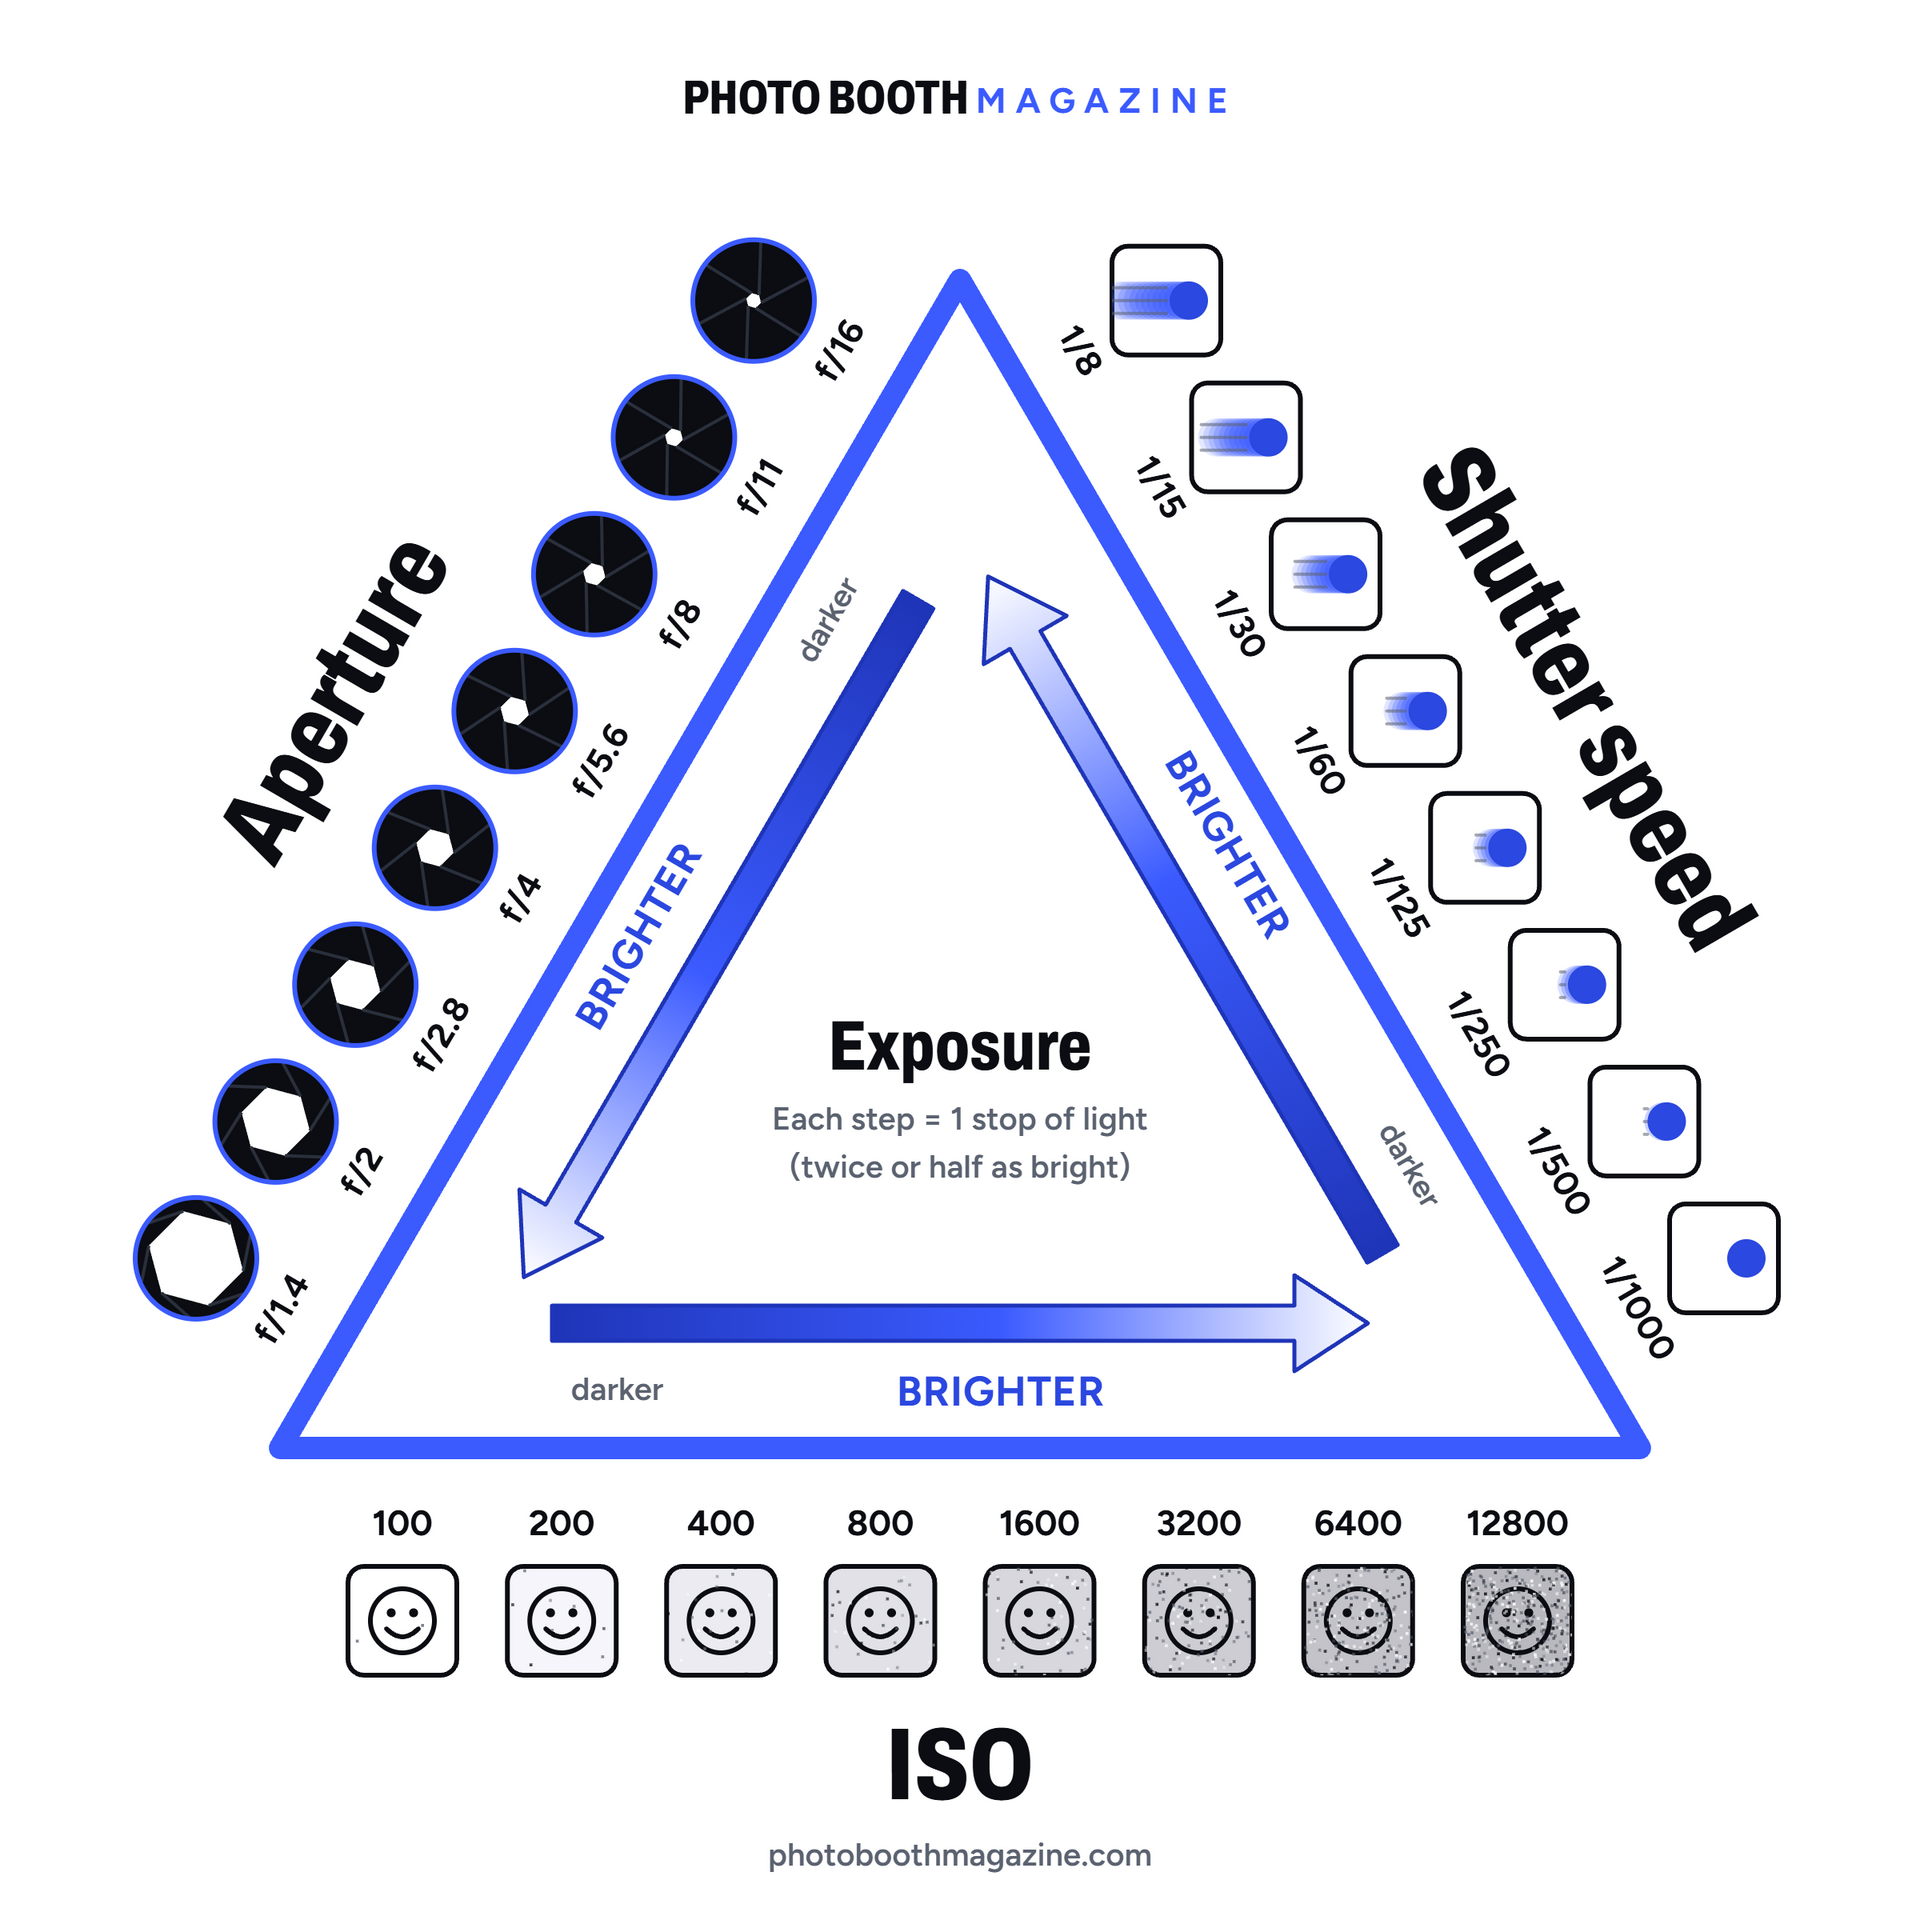
Dark guests. Black backgrounds. Blurry group shots. Grainy prints. Almost every booth photo problem comes down to three camera settings: aperture, shutter speed and ISO. The cheat sheet above puts all three on one page. Here's how to use it at your next event.
How to read the triangle
Each side of the triangle is one setting. Each step along a side is one "stop" of light, which means twice as bright or half as bright. Follow the arrow inside the triangle toward BRIGHTER, or go the other way for darker.
Every setting has a side effect, and that's the part that matters most:
- Aperture(f/1.4 to f/16) changes how much of the scene is in focus. A low f-number is brighter but leaves less of the group sharp.
- Shutter speed(1/8 to 1/1000) changes motion blur. A slower shutter is brighter but can blur moving guests.
- ISO(100 to 12800) changes grain. A higher ISO is brighter but adds noise to your prints.
The trade rule: if you make one setting a stop brighter, make another a stop darker, and the exposure stays the same. That's how you swap one side effect for another without changing how bright the photo looks.
The booth twist: flash changes the rules
Most open-air booths use a strobe or speedlight, and the flash fires faster than any shutter speed. That means:
- Aperture, ISO and flash power control how bright your guests look.
- Shutter speed mostly controls how bright the background and room look.
- Don't go faster than your flash sync speed, usually around 1/200 or 1/250 (check your camera manual). Go past it and you'll get a dark band across the photo.
So if your guests look perfect but everything behind them goes black, don't touch the aperture. Slow the shutter down and let more room light in.
Good starting settings
- Open-air booth with a strobe or speedlight: ISO 100 to 200, f/5.6 to f/8, 1/125.
- Enclosed booth or constant LED light (no flash): ISO 400 to 800, f/4 to f/5.6, 1/60 to 1/125.
- Big groups: f/8 or higher, so the back row stays sharp. Make up the light with flash power or ISO.
These are starting points, not rules. Always take test shots of a real person, at the venue, with the room lights set the way they'll be during the party.
Quick fixes at the event
- Guests too dark: open the aperture one stop (f/8 to f/5.6), or raise the flash power or ISO.
- Guests too bright or washed out: close the aperture one stop (f/8 to f/11), or lower the flash power.
- Background too dark: slow the shutter (1/125 to 1/60 or 1/30) to let in more room light.
- Blurry guests: speed up the shutter, or add more light so the flash does the freezing.
- Grainy prints: lower the ISO and add light instead.
- Back row out of focus: raise the f-number (f/5.6 to f/8), then raise ISO or flash power to make up the light.
What about iPad booths?
Many iPad booth apps set exposure automatically, so you won't see all three settings. If your app lets you lock or adjust exposure, the same rules apply. Either way, the biggest upgrade for an iPad booth is better light, not a different setting.
Keep it in your kit
Download the cheat sheet, print it and tape it inside your road case, so whoever runs the booth can fix a dark or blurry photo in seconds. Got a favorite setting for your booth? Share it in the Photo Booth Magazine Facebook group.